SSL plays an enormous role in keeping your WordPress website secure. With SSL certificates, you can securely enable HTTPS so that all the data exchanged between your site and the site visitors is encrypted, protected, and out of prying eyes. In this article, we are going to cover three easy ways to get FREE SSL for your WordPress site and keep it secure without breaking the bank!
Why SSL?
Before diving into the free options, let’s quickly highlight why SSL is crucial for your WordPress website.
- Data Security: SSL encrypts sensitive information like login credentials, personal details, and payment information, preventing unauthorized access.
- Building Trust: Websites with SSL certificates show a padlock symbol in the browser, reassuring visitors that their data is safe.
- SEO Boost: Google and other search engines favor HTTPS websites, giving them an edge in search rankings.
- Protection against Cyber Threats: SSL protects against man-in-the-middle attacks, among others, where attackers intercept data.
1. FREE SSL Through Your Hosting Provider
Most WordPress hosting providers will give you free SSL with the hosting package. This is the easiest and most reliable way to protect your WordPress site with SSL.
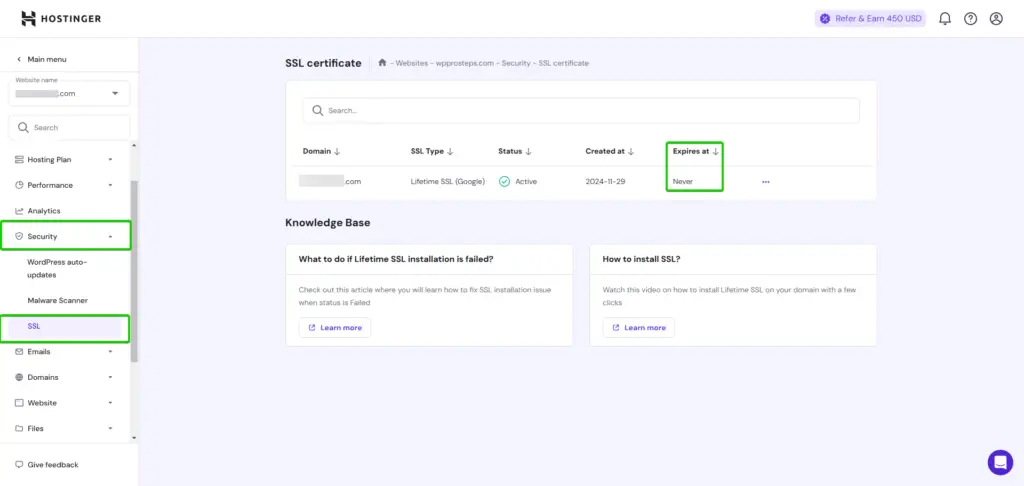
How It Works:
- Sign Up: Sign up with a host that provides free SSL, like NameCheap, SiteGround, or Hostinger.
- Auto Setup: Most of them automatically install and configure SSL on your WordPress site upon installing WordPress.
- No Hassle: There is no hassle, as there are no steps to be taken from your side. You just have to enable it, and your site will be live on HTTPS.
It will be very useful for those who seek a smooth and easy SSL setup. This includes having a secure site without the installation of plugins or third-party tools.
2. Lifetime FREE SSL with Cloudflare
Cloudflare has become a popular way to get a free SSL certificate on your WordPress site. It’s easy to set up, and you also get some added bonuses like better performance via Cloudflare’s CDN. Here’s how you can set up Cloudflare:
Step 1: Create a Cloudflare Account
- Sign Up: Go to Cloudflare and click “Sign Up.”
- Enter Your Details: Enter your email and create a password.
- Add Your Website: Fill in the domain name-for instance, example.com and click “Add Site.”
Step 2: Choose a Plan
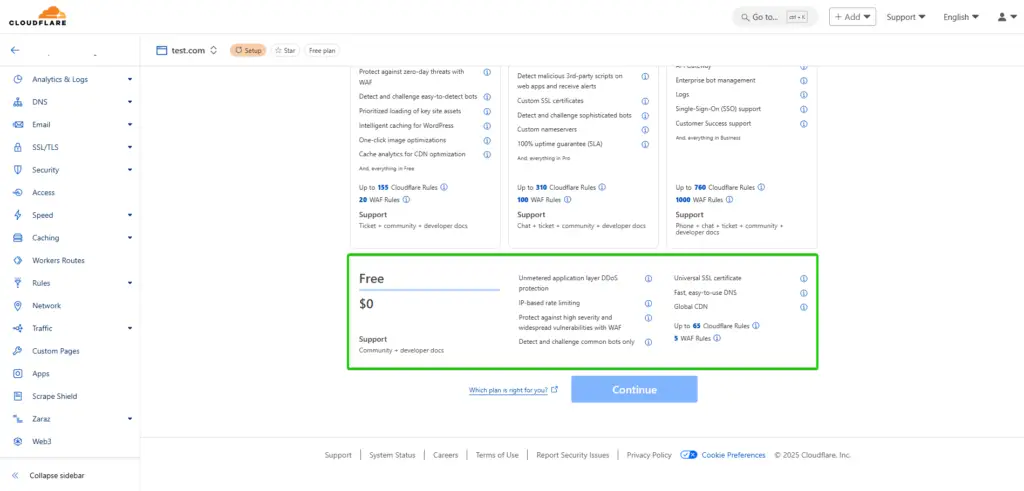
- Choose Free Plan: This will open a window to select a plan; choose the Free Plan and click “Continue.”
Step 3: DNS Records Scanning
- DNS Scanning: Cloudflare will automatically try to scan the current DNS records for your site. If it goes well, you can proceed to the next step. If not, no issue; just proceed with the following steps for manual configuration:
Set up A and CNAME records:
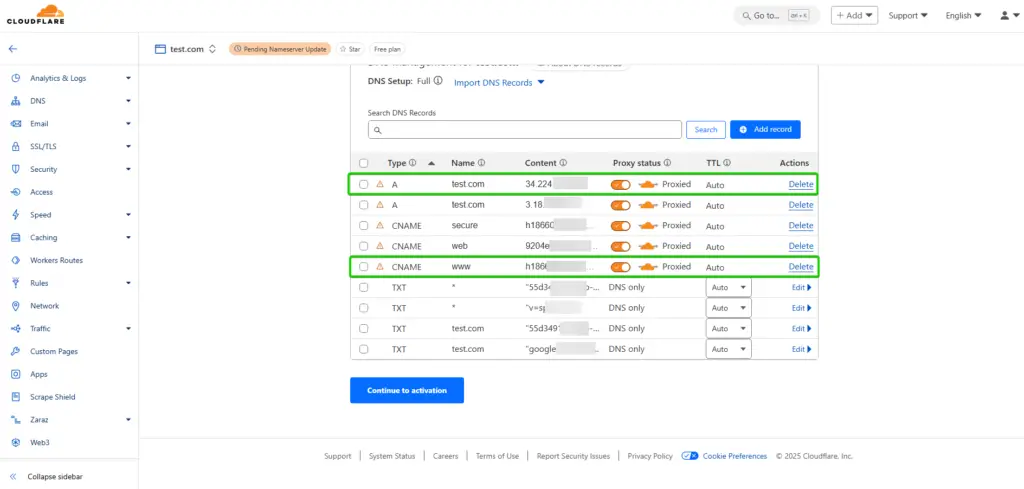
- A Record for @ (root domain): Point this to the IP address of your hosting provider.
- CNAME Record for www: Point this to your root domain (e.g., example.com).
You can find these DNS settings in your hosting account’s DNS management section. Make sure to add both records, as Cloudflare requires these to route your domain traffic correctly.
- Continue: After ensuring your DNS records are correct, click “Continue.”
Step 4: Replace the Nameservers
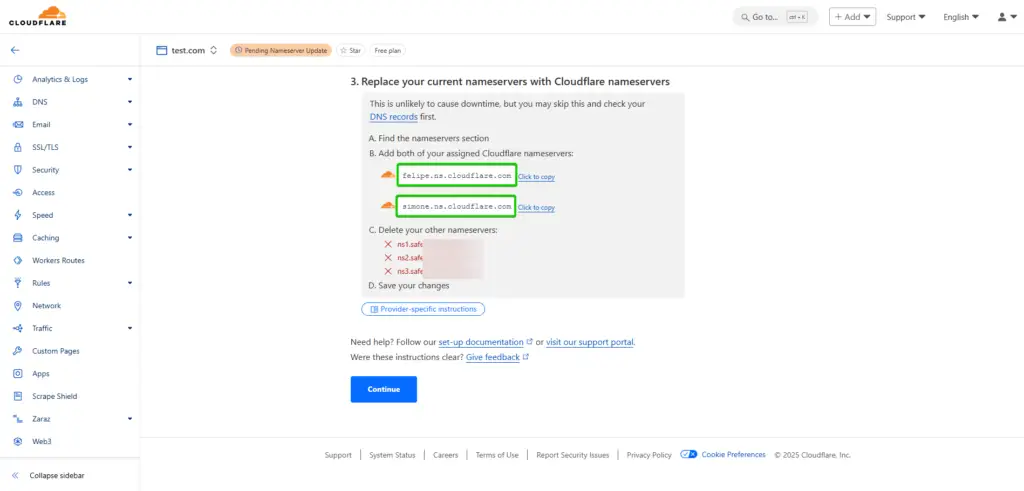
- Replace Nameservers: Cloudflare will provide you with two nameservers. You will have to update your domain registrar’s nameservers to these Cloudflare nameservers.
Log in to your domain registrar, such as Hostinger, Namecheap, etc. Navigate to DNS settings for your domain and replace the current nameservers with those provided by Cloudflare.
Step 5: Configure SSL Settings
- Go to SSL/TLS Settings: In your Cloudflare dashboard, click on the tab for SSL/TLS.
- SSL Mode: Set to Flexible SSL (or Full SSL if you have an SSL certificate installed in your origin server).
- Enable Always Use HTTPS: At Edge Certificates, enable “Always Use HTTPS” to forward all traffic to HTTPS.
Step 6: Install the Cloudflare Plugin on WordPress
Log in to the WordPress Admin Panel.
- Add Plugin: In Plugins > Add New, search for the official plugin for Cloudflare and install it.
Activate the Plugin.
Step 7: Connect the Plugin to the Cloudflare Account
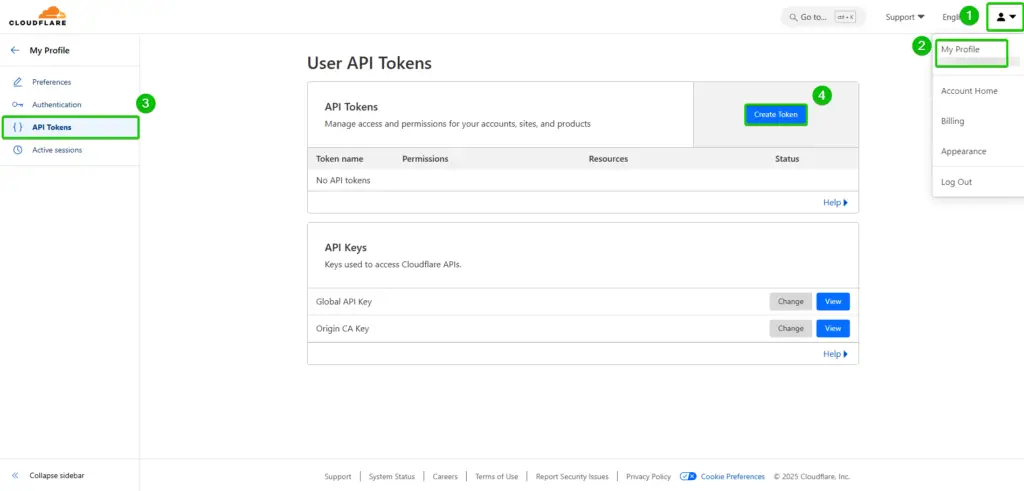
- Open Plugin Settings: Go to Settings > Cloudflare in your WordPress dashboard.
- Sign In: Click on “Sign in here” and enter your Cloudflare email and API key found in your Cloudflare account under “My Profile” > “API Tokens“.
Step 8: Force HTTPS in WordPress
- Configure HTTPS Settings: If using Flexible SSL, install the “Cloudflare Flexible SSL” plugin to avoid redirect loops.
Step 9: Verify Installation
- Check Your Site: Visit your site using https://yoursite.com to confirm it loads without security warnings.
- Use Online Tools: Use tools like SSL Labs to verify if your SSL is properly configured.
3. FREE SSL with the Really Simple SSL Plugin
If you want an easy way to add SSL to your site after it’s already been installed, or if you don’t want to mess with DNS settings, the Really Simple SSL plugin is your best bet.
Setup Steps:
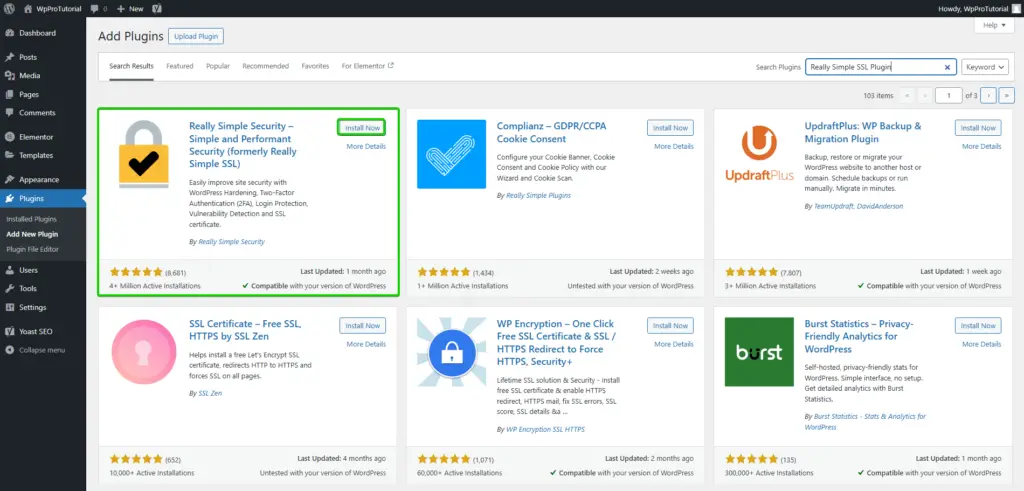
- Install Plugin: Go into your WordPress admin panel, search for “Really Simple SSL” in the plugin repository, and install and activate it.
- Enable SSL: Upon activation, the plugin will automatically detect an SSL certificate and configure your site to run on HTTPS.
- 301 Redirect: On plugin settings, enable 301 .htaccess redirect so that all visitors are forwarded to your site’s secure version.
This plugin is ideal for any person wanting to enable SSL on their site without much hustle and does not want to get into technical details.
How to Choose What Suits You Best
Now that you have three options, which one are you going to use? Here’s a quick rundown:
- Hosting Provider’s SSL: If your host offers free SSL, this is the easiest and most reliable choice. It’s often created automatically with very little to no work on your behalf.
- Cloudflare SSL: In case you’re after additional performance benefits, having more control over security will be ensured with Cloudflare’s free SSL. It is perfect in case you want to boost the speed of your website all over the world and have one more layer of protection.
- Really Simple SSL Plugin: This is very convenient if you want to have your own quick SSL setup. This is the perfect solution when a host doesn’t provide SSL or when you want to configure some aspects of SSL within WordPress quickly.
For most use cases, the best place to start will be your hosting provider’s SSL. If they don’t offer this, or if you want some more advanced features, then Cloudflare is a great next step. If you prefer simplicity and ease of use, Really Simple SSL will get the job done.
Stay Secure
Whichever path you take, securing your WordPress with SSL is a vital step toward ensuring your users, improving your SEO, and gaining trust. Although it might sound like a heavy lift, all of the above options are free to make the process much easier, such as locking up your site for free forever. Be sure to choose your option according to your needs, and enjoy a secure, reliable site that you can have confidence in, and so can your visitors!


