Setting up a reliable WordPress automated backup system is important to building a site. There are plenty of ways to set up an automated backup system, but to protect your data from an unfortunate event, it’s essential that you choose the best one. This article will share two of our favourite ways to set up WordPress auto backup.
With cPanle
For our first method, we will use your hosting provider as our backup system. Every hosting provider, such as Hostinger or NameCheap, has an integrated automated WordPress backup system.
This will be the most reliable way to back up your WordPress site since you do not have to rely on third parties or worry about data being stolen. Everything will stay secure in your own hosting account. To get started,
Login to your cPanel account > Open WordPress from Softaculous App Installer
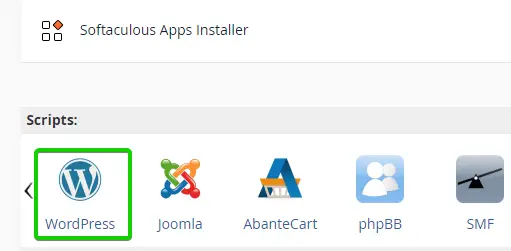
Once the Softaculous app is open,
- Head to All Installation (1) to see all the WordPress installed on your hosting.
- Choose the domain (2) to which you want to set the automated backup system.
- Click Edit Details (3).
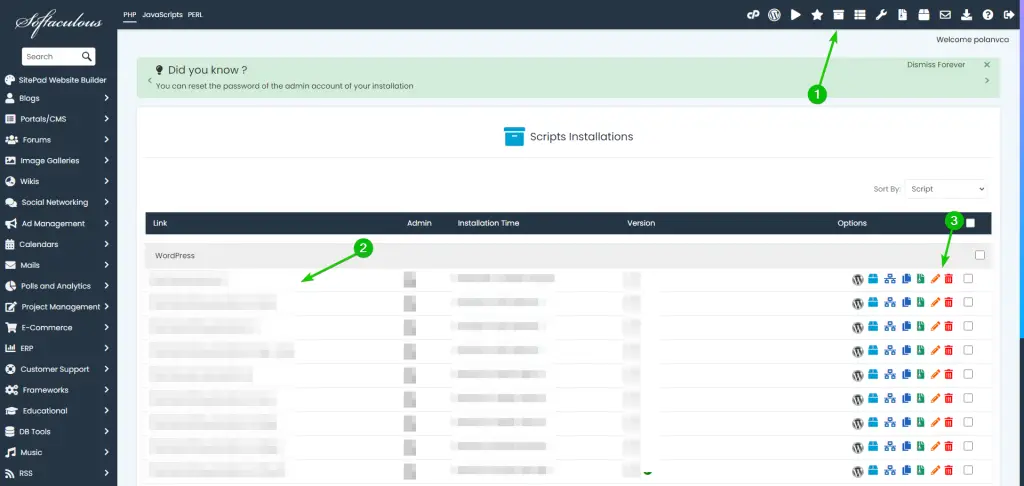
Scroll down until you see Automated Backups.
- Automated Backups (1): Set how often you want to take a new backup. Daily is recommended.
- Backup location (2): Leave it default.
- Backup Rotation (3): The number of backups you want to store in your hosting account. If set to 5, it will store 5 days of backup, and the oldest backup will be deleted on the 6th day to make a new backup. You can choose this number depending on the storage on your hosting package.

Make sure to save the changes, and it’s done! Your hosting server will take a daily backup of your site and store it in your hosting server.
Other Hosting Provider
Most WordPress hosting is based on cPanel, but exceptions like Hostinger and GoDaddy are not. So, it would be impossible for us to cover all the different hosting providers’ automated backup systems.
Reach out to your hosting provider to learn how to use their backup system. If your hosting provider does not offer an automated backup system, then use our 2nd method.
UpdraftPlus: WP Backup & Migration Plugin
UpdraftPlus: WP Backup & Migration Plugin is our second choice for an automated WordPress backup system. Over 3 million active users use this plugin to back up their WordPress sites.
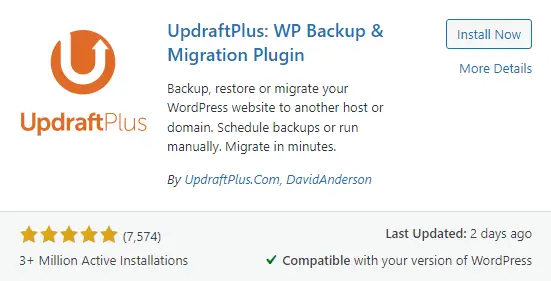
Download the plugin from the plugins section. Once you have it installed and active, follow the steps to set it up properly.
Chose Your Remote Storage
Head over to Settings > UpdrafPlus Backups > Settings
Select a remote storage location that you want to use and sign in with your account. You can use almost every cloud storage for this. Starting from Google Drive to Amazon S3. For this tutorial, we are going to use Google Drive.
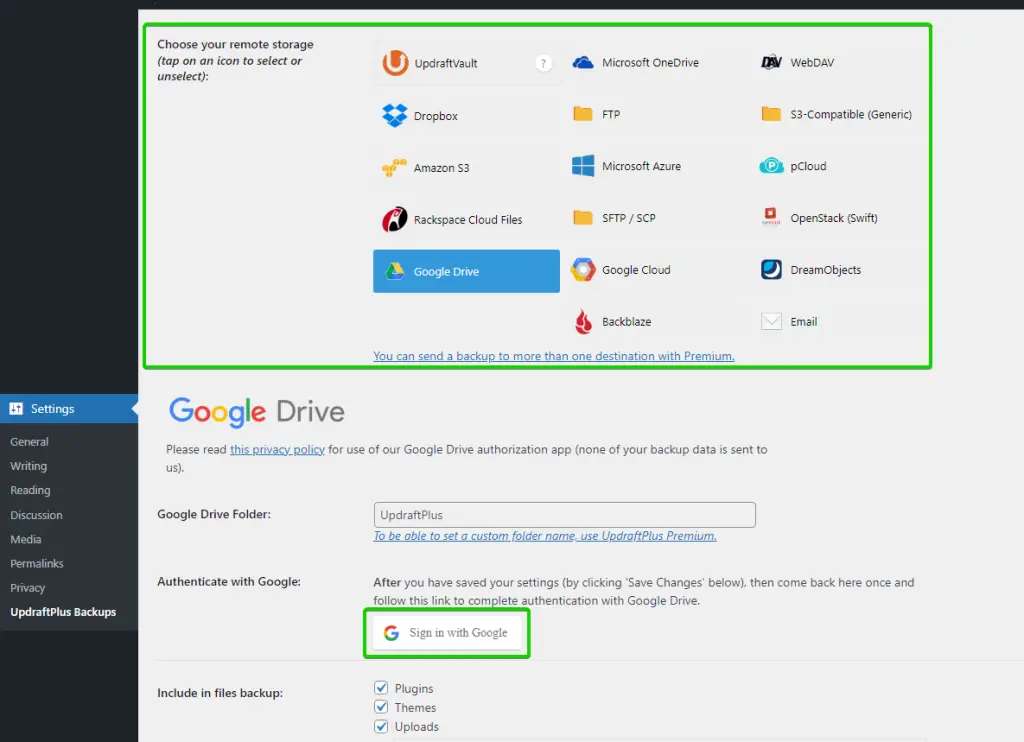
Once you sign in with your account, you will be sent back to the settings page, where you can set how often you want to back up your site and its database.
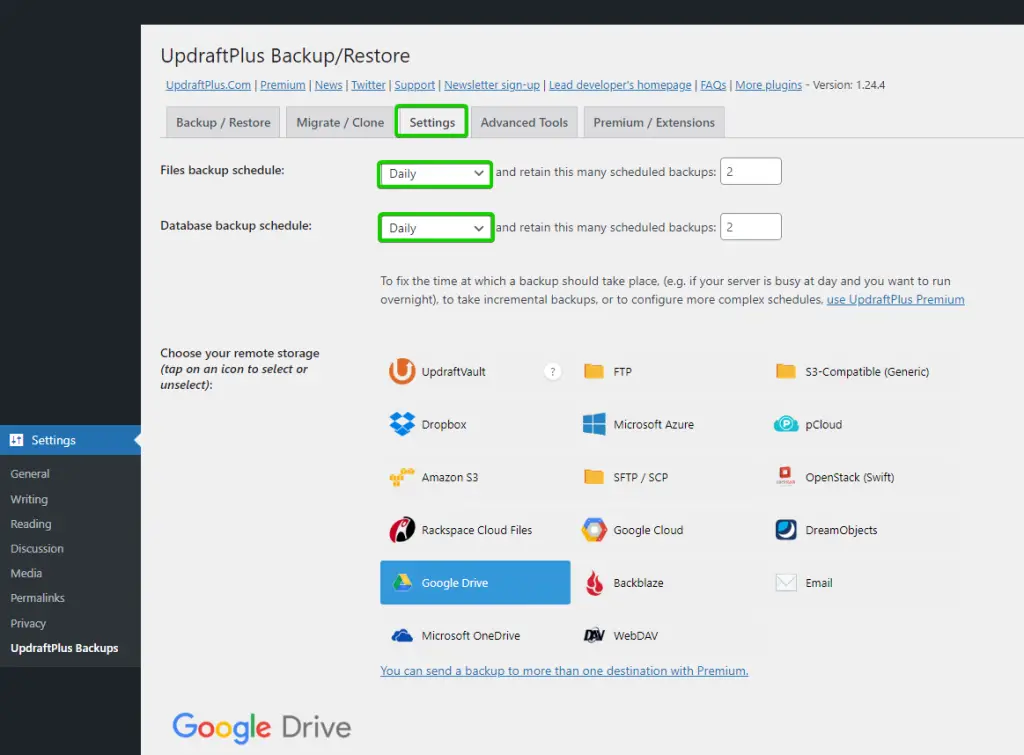
It is important to back up your site’s files and database. Click save to confirm your changes.
- File backup schedule: Choose how often you want to take backup of your site. (Daily is recommended)
- Database backup schedule: Choose the same days as the file backup schedule.
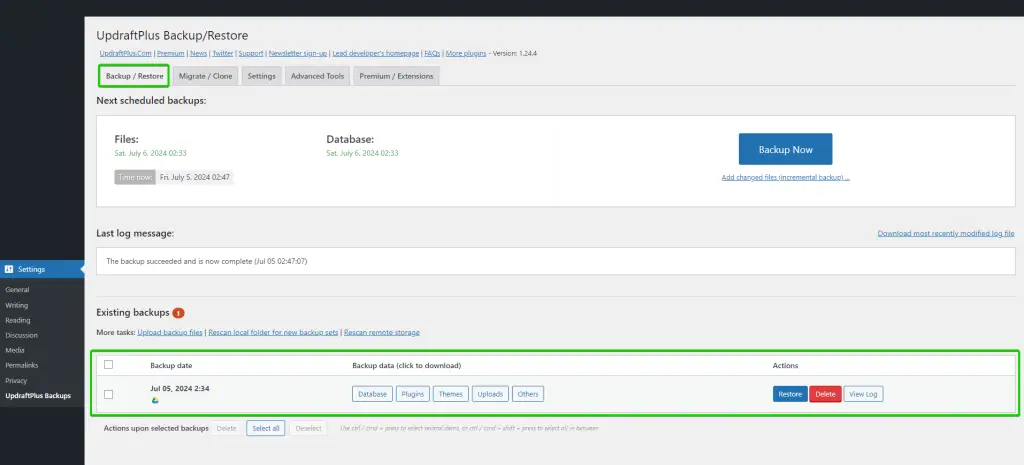
To verify your backup system, go to the Backup / Restore tab. You will see your recent backups ready to be restored if needed.
You can also open your Google Drive or any other remote storage location you have chosen to verify your backup files.
That’s it! Now, your WordPress site has an automated backup system for FREE. Depending on which route you choose, the backup location is your own hosting account or Google Drive, so there is no need to worry about anyone getting your data!

